
First off, it would be remiss of me if I did not acknowledging that this is the first blog post in a very long time. Notwithstanding the notice announcing a site redesign, it has been 5 and a half years since my last post. Even then, that was a repost of an article written for my then employer, Orbit Media Studios.
I’ll save the story of the last five years for later.
For now, welcome back. Let’s kick things off with some retro computing.
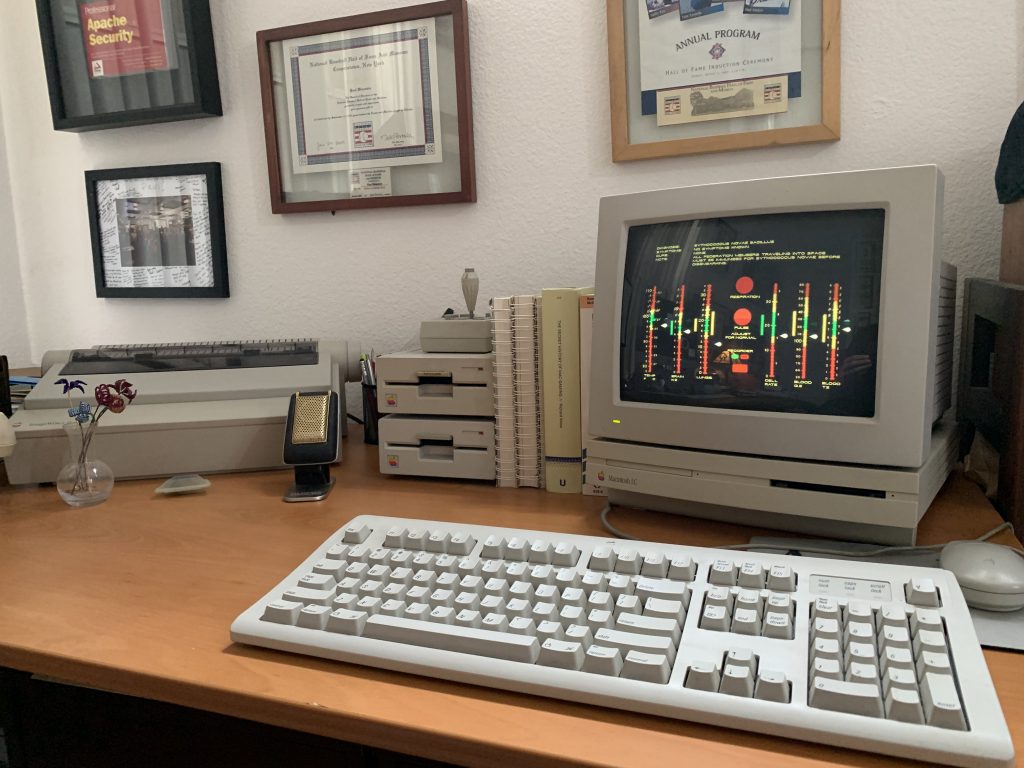
Due to various choices, my personal computer history is quite Apple centric.
The first computer in my childhood home was an Apple //e. That was followed by a //gs which was quickly followed by a Macintosh LC. That LC, despite the continued designation as the family computer, sat in my bedroom during high school and then left with me when I was off to college.
I still have that LC.
Technically, it’s a LC II, after a processor upgrade offered by Apple was applied. In fact, the LC’s “pizza box” architecture went on to spawn a family of mid-range education/consumer friendly Macs for much of the 1990s.
Why? Well despite design limitations that kept the machine “low cost”, the LC models offered aspace between the high-end, fully configurable professional models of the era and the closed-up, all-in-one models that provided Macs with their first iconic image. In fact, a defining part of the LC line was Apple’s continued support of the original LC’s PDS slot. This resulted in a market of expansion options that started with the Apple IIe card (more on that in a bit) and continued with CPU accelerators, video, graphics and networking cards among other options.
So, even without my personal attachment, for a retro Macintosh setup beyond the quintessential, all-in-one 128K/SE/Classic, I would suggest one of the many LC models as an excellent, hackable computing platform.
First, a word a caution. While I tried to take care in storing my LC, in its original packaging and all, I made one fundamental mistake, I neglected to remove the battery that powers the PRAM from the motherboard. Anyone who has ever seen the outcome of a forgotten alkaline battery knows what happened, it exploded, resulting in battery acid and corrosion within the radius of the battery.
Even if you get a clean machine from eBay, keep in mind the PRAM stores important system settings between startups. So, if your freshly dusted-off Mac appears to have issues with video display settings or forgetfulness of other settings, such as the system clock, try replacing the battery.

With luck, you’ve secured a working system with little to no issues. Now what? As a helpful reference, here’s a rundown of hardware modifications I made as a starting point.
RAM
Maxing out the RAM is the obvious first step. For the LC the max is 10MB. This can be achieved by adding 2x4MB SIMMS (8MB) to the 2MB of onboard RAM.
Apple IIe Card
If you’re interested in expanding the retro experience, the next step is installing the LC compatible IIe card.
The IIe card contains everything needed to run Apple II software; RAM, CPU and logic chip on a card specifically made for the LC. The software that accompanies the card provides a control interface and exposes the LC’s other resources to the IIe environment.
In addition to locating a IIe card, you’ll need at least one Apple II disk drive and a specialized Y-cable. The disk drive(s) will plug into the Y-cable – which includes a second input for a joystick – which in turn is plugged into the IIe card.
SCSI2SD
The first two upgrades I’ve listed are pretty standard, expanding the system with era-relevant enhancements. The final hardware recommendation is of a more modern variety, replacing the hard drive with flash memory.
There are a number of reasons I would suggested making this alteration. Even if you can locate a “like new” system or a “low mileage” hard drive, if you plan of using your classic Mac for any length of time, you’ll want to minimize data loss issues due to “normal” wear and tear.
There are also other advantages to using a flash drive, such as being able to sneakernet large files from a modern system to the LC, making backups and disk images and being able to validate software against an emulator before deploying.
A quick aside, modern flash memory comes in multiples of gigabytes, even terabytes of storage. But how many gigabytes your classic Mac can access at a time will depend on which version of operating system is in use. The Mac filesystem, HFS, has seen a number of capacity enhancements over the decades. System 7.5, for example, introduced support up to 4 GB. Prior to that, the maximum limit was 2 GB. The end results is, regardless of which System OS is selected, maximizing the use of flash memory will require setting up multiple disk partitions on any single memory card.
So, how did I add hardware support for flash memory on my Mac LC? For this, I added an SCSI2SD adaptor. SCSI2SD is an open-sourced hardware & software architecture that allows for replacing physical SCSI drives with a SD memory card. There are a number of vendors who manufacture and sell the necessary components. I purchased my goods from Inertial Computing.
Specifically, I purchased the SCSI2SD V5.1 board with a 3.5″ mounting bracket, power adapter cable and SCSI ribbon cable.
For the most part, replacing the hard drive with the SCSI2SD solution is as straight forward as replacing RAM or installing the IIe card. Having said that I will note it took me a few tries in get the board, mounting bracket, drive rack and screws all aligned properly on the LC.
By the way, the LC does support external SCSI devices, so you can add the flash drive externally. Just note that you’ll need an enclosure for the SCSI2SD board as well as a SCSI DB25 adaptor. One advantage of going the external route is easier access to the SD card. While my LC case does have a punch out where a second floppy drive could be mounted, the opening was obviously designed for a 3.5 inch floppy, not a 32 mm SD card.
Dan and Steve’s Blog has a great collection of posts addressing various aspects of implementing the SCSI2SD solution for a classic Mac. Of specific note:
Even without these guides, don’t miss the Image Files for booting you Macintosh, which includes disk images of various OS versions for bootstrapping a flash drive.
I’ve purposely focused on hardware in the post. But software is also an important consideration, beyond the operating system. Two useful sites in getting started are the Internet Archive‘s mirror of Apple’s old software repository and Macintosh Repository.
And since I briefly mention emulation and transferring files via modern machines, for 68k Mac emulation, I’m using Basilisk II on a modern-day iMac. For reading/creating a disk image of the SD card, macOS includes Data Duplicator (dd), which can be used via Terminal. For writing the disk image back to the SD card, I’ve adopted balenaEtcher instead of dd.
Good Luck!